Over the past two weeks, I have been working heavily with Maya to finalise my designs. With the deadlines looming, I managed to book a slot to send my files to the printer and this week the pieces came out!
The final result is brilliant, I am thoroughly pleased with them and I look forward to incorporating hand crafted metal into them. Below are the renders of the final pieces.
Jewellery
Plique à jour
StandardIn addition to my 3D printing research, I continued experimenting with glass (which was a predominant feature in my previous project) Ideally, I wanted to include some form of it as a decorative element alongside the wire work and printing.
I started by researching enamelling, which is a glass powder that is heated to 820’C to form a glassy, coloured surface on metal. I felt this process was very appropriate for my jewellery designs. As I continued exploring enamelling, I discovered Plique à jour: a form of enamelling that fills gaps in metal or wire structures. This seemed perfect for my wire designs and when produced well, Plique à jour is a very impressive process.
I did have some success with this form of enamelling, however, it was very difficult to create large areas of enamel or control the tension and movement of the molten glass.
Over Easter, this lead me to broadening my practice to consider molten glass, applying it in the same way as Plique à jour but using a gas torch and glass tools. The results were fantastic, with a higher clarity and a dramatically reduced making time.
The images below show my progress with glass and enamel and the combination of wire, glass and 3D printed form appears to have a lot of potential that I plan to incorporate into my final designs.
Selective Laser Sintering (SLS) experiments
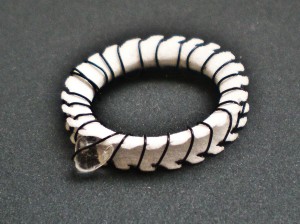
StandardSince my last post I have been rather busy with my final project. I have continued with 3d printing and have been experimenting with different forms. The material I am printing in: a poly-metric plastic powder, is fascinating and perfect for my designs. I can create delicate forms without the need for support and the material has a good level of flexibility which gives me a lot of options for my jewellery designs.
Below are a selection of experiments I recently produced. I am particularly pleased with the use of plastic in traditional stone settings.
Update 3D printing and Jewellery.
GalleryApologies for the overdue update, but since starting my new project, I have been very busy and have only recently made some progress that could be blogged about.
For this project I have decided to develop my designs from the last project but explore the potential of 3D Printing and new technologies in jewellery making and design. The intention is to find a balance between these new processes and the traditional ones to create an aesthetic balance in different jewellery forms. Initially, my practice was quite slow as I have to source technology available to experiment with 3D printing. At one point I thought I was going to have to send all my files to ‘Shapeways’- A company in Eindhoven and New York, which would be reasonably cheap but take three weeks!
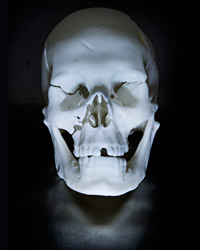
Fortunately, with the help of Loughborough Technicians in 3D Design and the Wolfson School of Mechanical engineering: I was able to find facilities available for third and fourth year students. This organisation is actually responsible for the research and printing of Richard III’s skeleton. More information can be found at their site: http://www.lboro.ac.uk/research/amrg/#tab1
Since finding a suitable printer and learning the CAD programme Maya, I have started to experiment with 3D jewellery forms to gain a better understanding of the material I am using and its abilities. The bottom picture is the most recent print and has been truly successful: the plastic is very strong but also flexible and can be pulled and stretched to fit a wearers wrist or finger, in addition, the level of detail is very impressive.
Not only have I been printing but I have continued my traditional technical research in jewellery. Last week I set my first stone: a garnet with a bezel setting and designed my own basic claw setting for pate de Verre glass around hand forged and cast wire. Both these small projects have allowed me to gain a greater understanding of jewellery making and taught me some useful techniques.
I have two weeks left until Easter and within those weeks I hope to develop these processes further and start to combine them in final prototype designs.
Final Pieces
GalleryApologies for the late update, the beginning of 2013 has been really busy with my dissertation and finishing my final project. But finally I have completed my project and can show you the results, which I am very happy with. Unfortunately I was unable to print a CAD designed piece due to limited access to the printer, so instead, I forged through with the handmade wire forms.
Considering I only started soldering in October 2012, I am very pleased with the standard I have reached. 🙂


